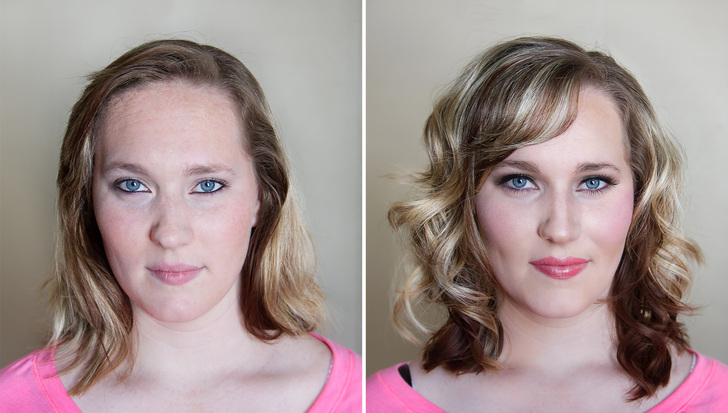
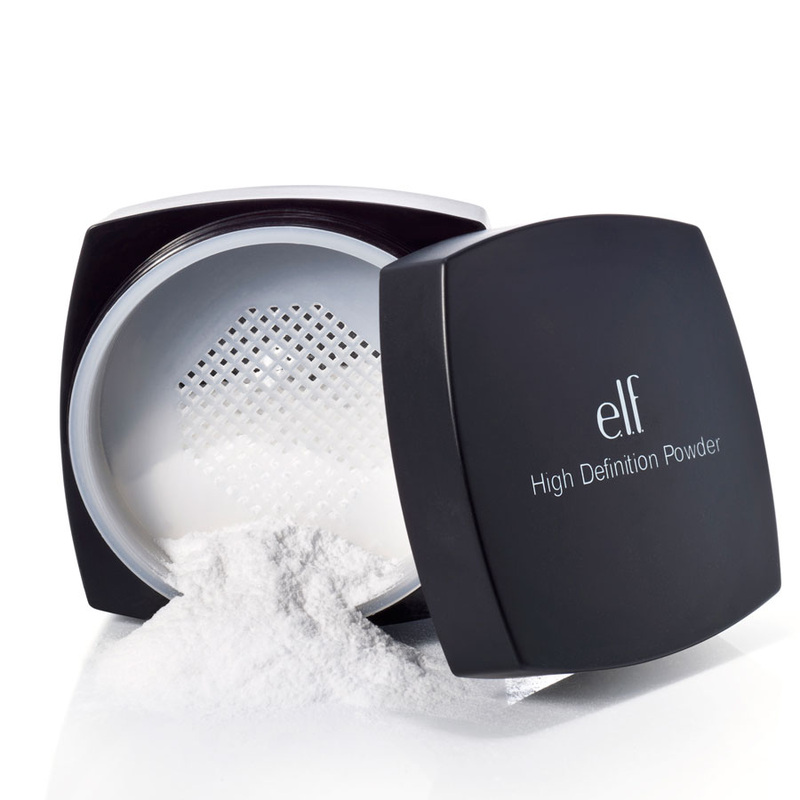
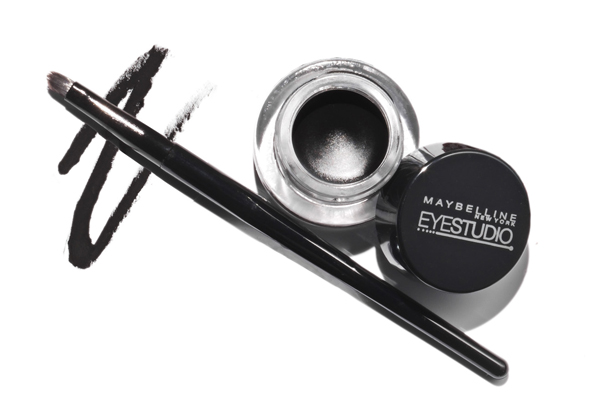
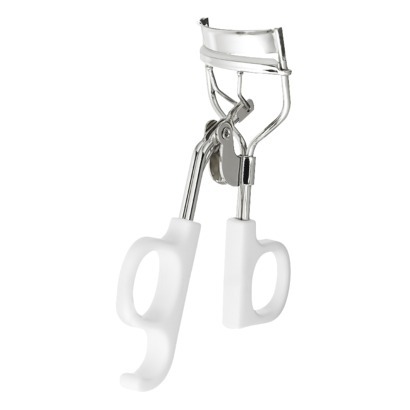
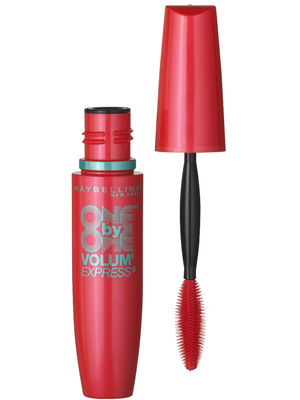
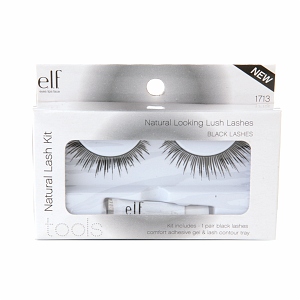
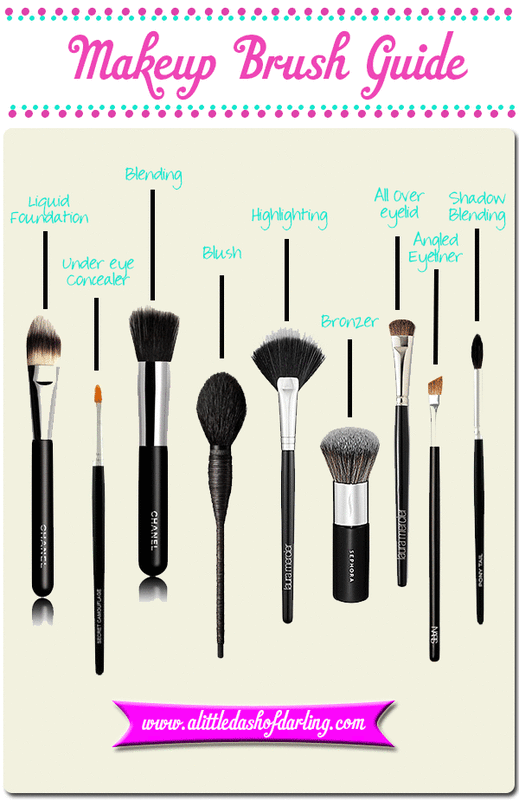
  Welcome to my Beauty Tips & Tricks blog and my photography website! Let me introduce you to Amber. She's a beautiful friend of mine and a wife and mother of 2 kids. I was so happy to be able to do this for her. As a mom myself, its nice to be pampered once in a while. As you can see in the image above, This is quite a transformation. I asked Amber to do her makeup how she would normally to it for pictures, (left image) Then after we snapped a quick photo, she took it all off and we started from scratch. Amber had really great skin Products: I said this in my previous post but I have to mention it again. When you're being photographed, I always recommend that you wear makeup that gives you a matte finish. There's nothing worse than having that horrible shine across your face in pictures because you used the wrong foundation. You might be asking, "can't you Photoshop that out?" Its a good question but the answer is no. You want to GLOW in pictures, not sparkle or have that greasy shine. The best product for you really depends on your skin tone and sensitivity. If you have clear, normal skin, you can wear basically anything. If you're like me, where I have the occasional blemish and a couple acne scars from my teenage years I want to hide, than you'll want something with a bit more coverage like cream products. TIP: When you apply cream products to your face, make sure you use a sponge and don't slide it on your face. Make sure you always stipple it into your face. Stipple: To apply with many light dabs in to your face. Below is a gallery of the products I used in the finished image. Hover or click on the images for more on each one. Now lets get to the breakdown of what mistakes Amber was making.... Breakdown... 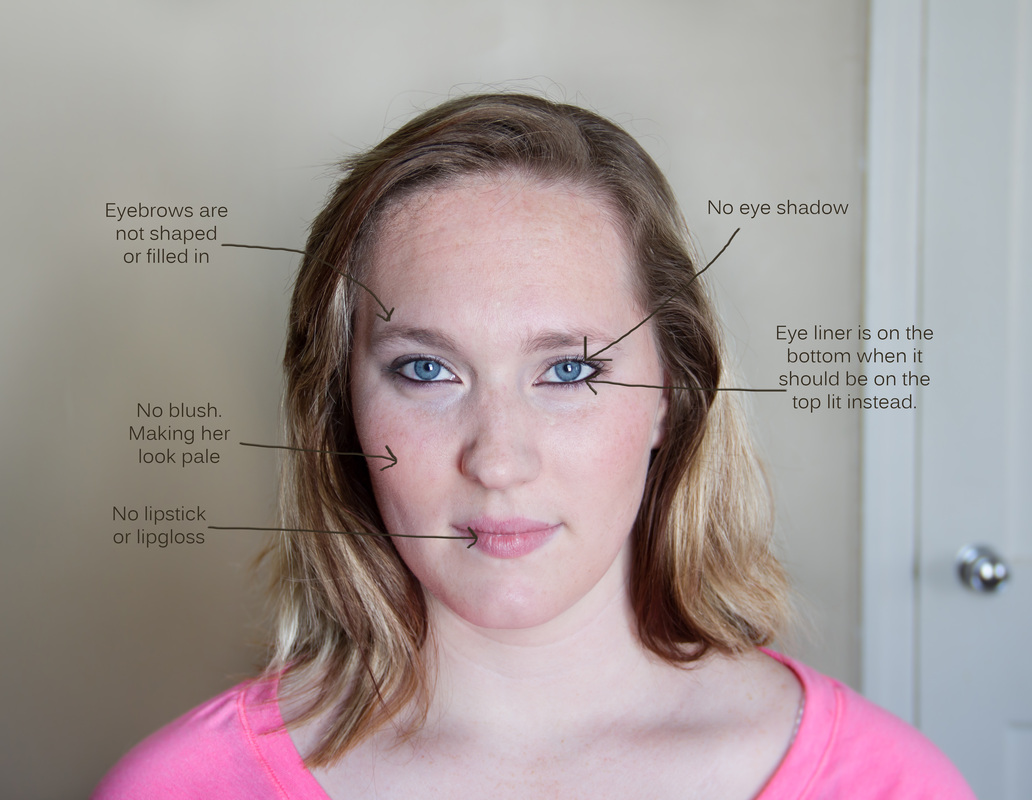 Contouring Breakdown... 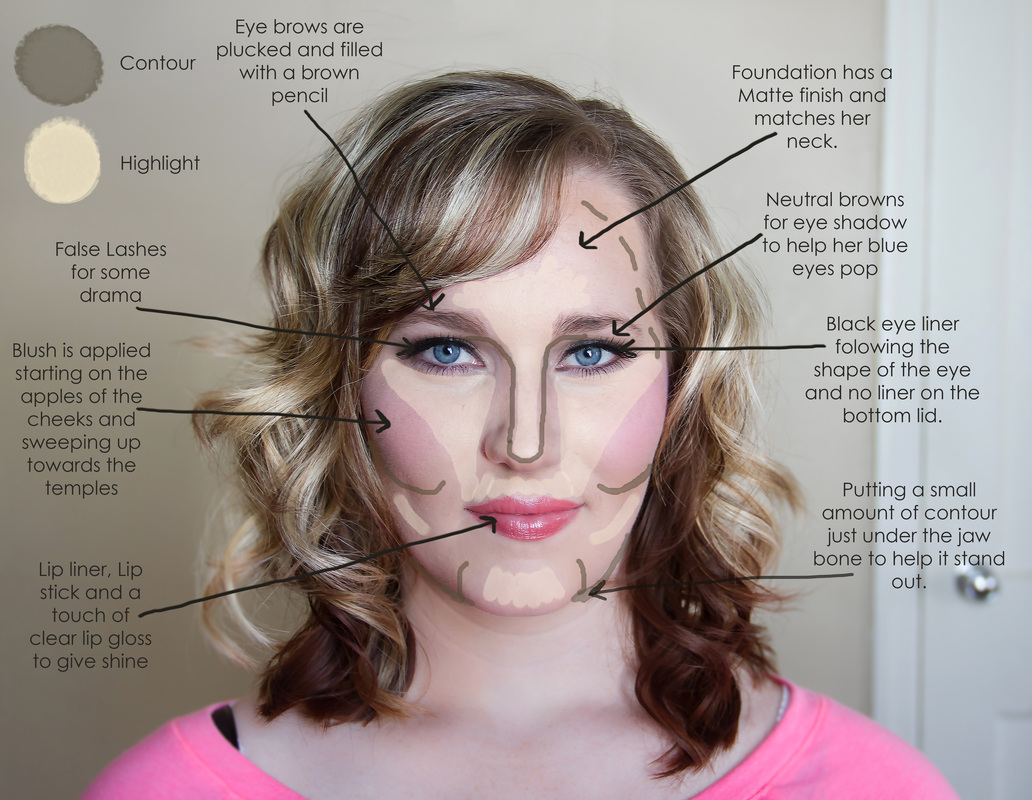 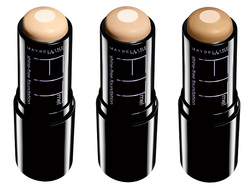 FOUNDATION: I used the Fit Me stick from Maybelline. I used the lightest shade in the image because it matched her skin tone and I used the darkest shade in the image for her contouring. When using this product, you'll glide it onto your face and neck then using a stippling brush, (I use the Elf brand stipple brush) I gently blended it into her skin. It gives the perfect matte finish and it feels very light. CONTOUR: As you can see in the breakdown image above, I used the darker shade in specific places. Under her cheekbones to give them definition, under the jaw to help her Jawline from disappearing, around her nose to thin it out to show how long and thin it really is and around her hair line to give her face dimension. TIP: For OVAL, DIAMOND and HEART faces, you never want to bring the contour down too far on your cheeks because then you will lose your jawline. Only SQUARE and PEAR shapes can use that technique. 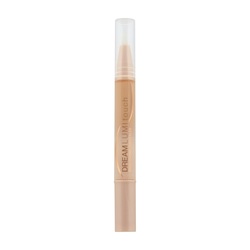 HIGHLIGHTING: I used the Dream Lumi Touch Highlighter and Concealer by Maybelline. You'd think they could have picked a shorter name. ;) I used the lightest shade because she is already has fair skin. When picking a highlighter, always get one that is only within 2-3 shades lighter than your foundation. Again, in the image above, you can see where I placed the concealer. After you've applied both Contour and highlighter, its time to BLEND!!! Make sure that you use 2 separate brushes to blend your contour and highlight. You can also use sponges to blend. After that's done you get to apply your blush. BLUSH: This should be applied with a blush brush and starting on the apples of your cheeks, brush it up towards your temples and if needed, slightly blend in with the contour as well but don't overdo it. Then apply a SHEER powder to the whole face. 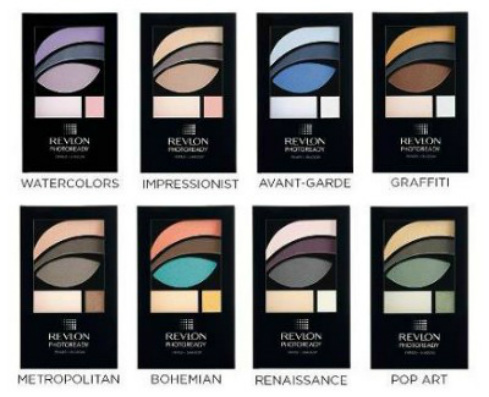 EYES: After you've curled your eye lashes with an eyelash curler, apply your eye shadow. I love this line from REVLON. you can see where you'll apply each color. Its so helpful to have that guide. If you don't have this as a guide, here's some things to keep in mind.... Stop using super light pastel's and glittery eye shadow. If worn, pastel colors should never be alone. Pair them with coordinating colors to give dimension. Start using colors that are more neutral and if you do use colors, I like to keep to jewel tones. Especially for pictures. They are richer in color and are much more flattering. I used the METROPOLITAN on Amber. Then you'll want to apply your eye liner followed by Mascara. FALSE LASHES: These can really enhance your eyes. I always try and have my clients wear these for their photo session. Unless you are one of the few with perfectly thick, long, dark and curled eyelashes, then you wont have to do this step. :) I'll be making a video for this soon. 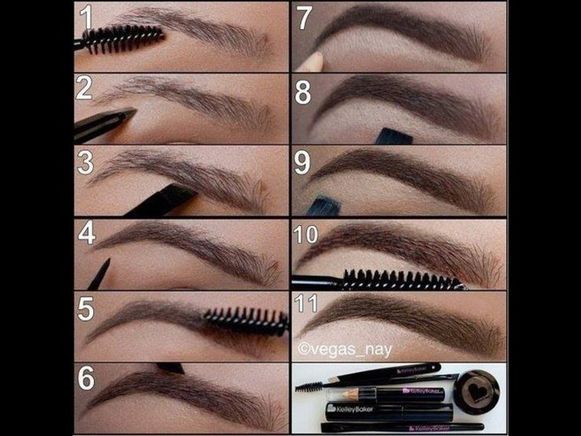 EYEBROWS: This step is ALWAYS ignored and one of the most important. That's why I'm giving it its own little section. Your eyebrows frame your eyes and help to frame your face. PLEASE don't forget to do this. You can do it a couple of ways. I like how its shown in this image. First, brush them out, apply a pencil where you want the line to be, or just follow your natural eyebrow. Then using an angled brush, apply eye shadow or a cream that matches your hair color to your whole eyebrow. If your hair is platinum blonde than you'll need to make sure that your eyebrow color is no more than 2-3 shades darker than your hair. 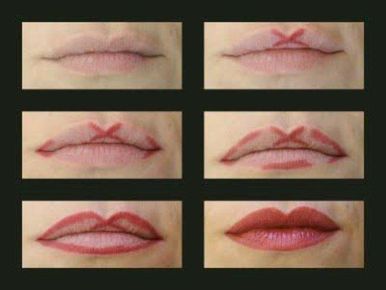 MAKE YOUR LIPS DRAMATIC: Create a plump dramatic lip to draw attention to your lips with dramatic lip color and a plump pout. When being photographed, Its always best to go darker than you normally would. Using a lip liner will dramatically help to create that full look. After I apply my lip color I add just a hint of clear lip gloss for a bit more shine. Below is a helpful lip color guide for each skin tone. 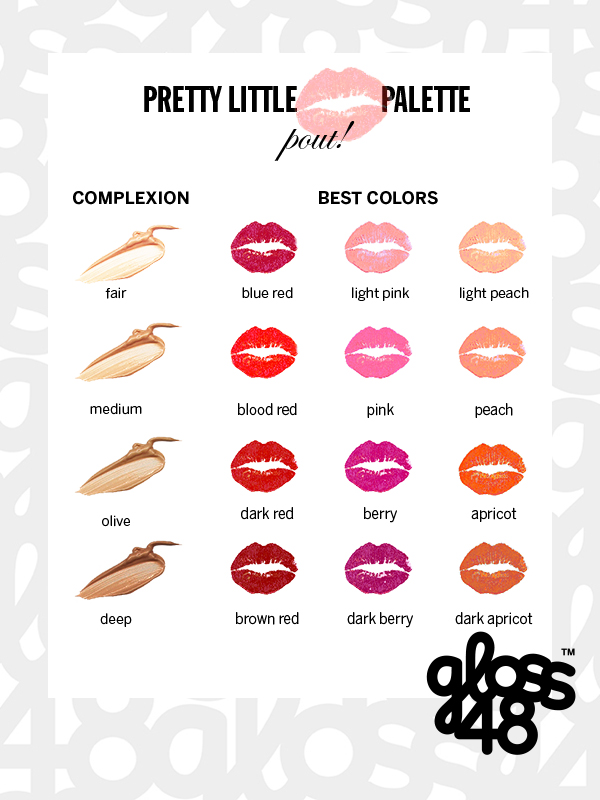 Thank you all again for reading! I hope you'll come back again. If any of you have requests or questions, let me know in the comments or contact me. My next post will be on RECTANGLE face shapes. To end this post, I thought I'd give you a little bit of the session I did with Amber. If you're wondering if these images have been Photoshoped, they have. However I have NOT Photoshoped her face at all! Of course I sharpened them, added some shadows, warmth, etc. Enjoy! 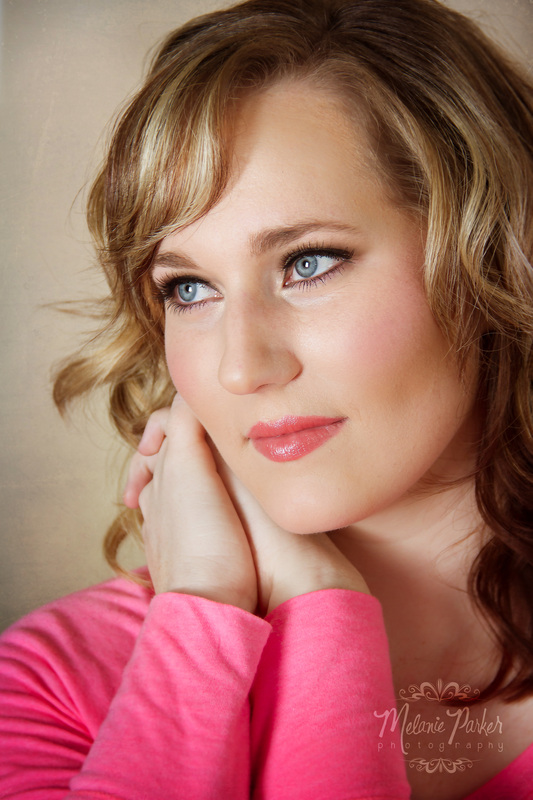 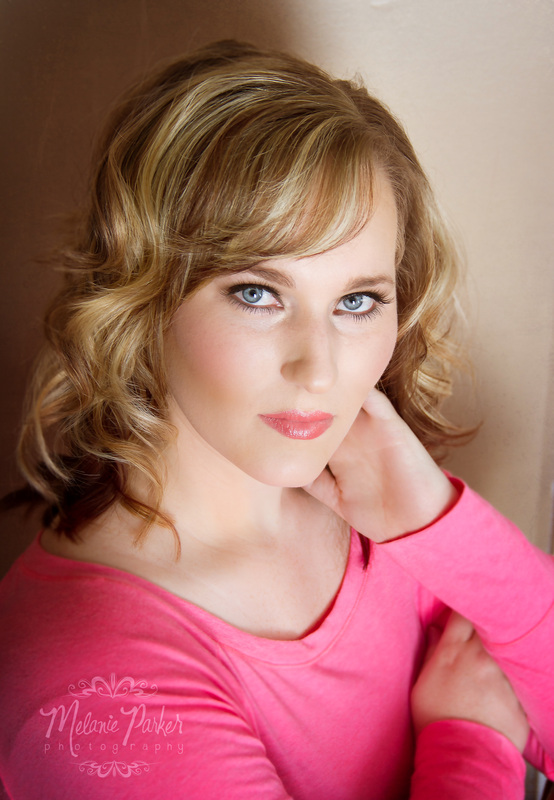 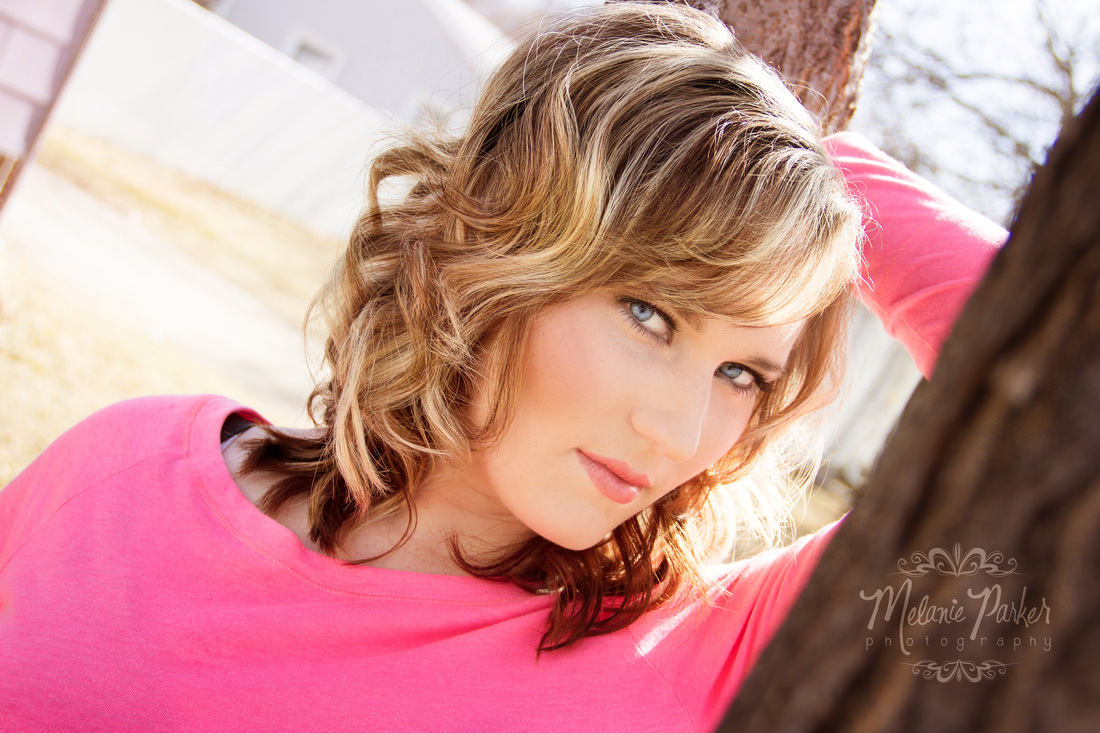 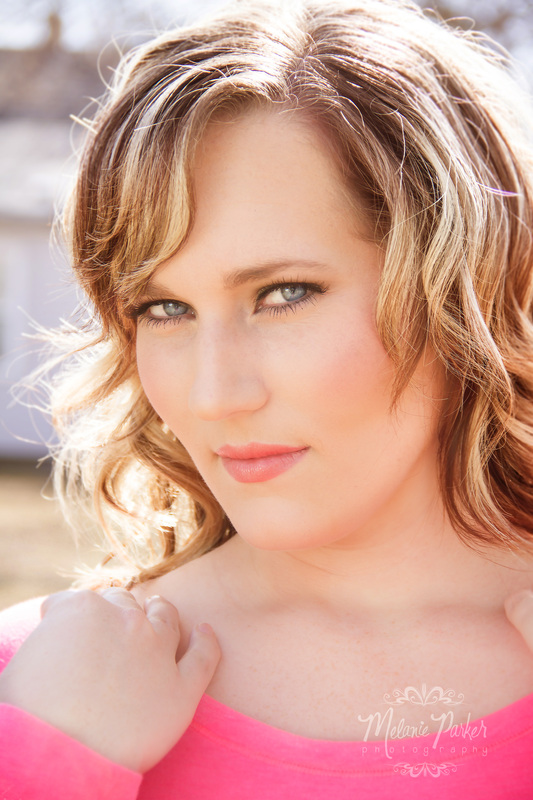
0 Comments
Welcome to my blog and photography website! Let me start off by telling you a little about me.... When I jumped into photography about 4 years ago, I also jumped into Photoshop, airbrushing and all those super fun techniques that make people look "perfect." At first it was exciting to learn new things but then It started to feel..... wrong. I couldn't bring myself to change people to look a certain way. I never changed someone's nose, thinned out their chin or made them loose 5 lbs. But even making them have flawless skin or perfectly vibrant eyes was something I just couldn't do. I have learned to love me for exactly who I am and see everyone as beautiful. When I say that "I see everyone as beautiful." I mean it. I struggled with my self image for many, many years. At one point, my obsession to be perfect, valued and beautiful contributed to a severe eating disorder that controlled me for 5 years. Believe me when I say, "I know what it feels like to have low self esteem." I was one of those girls at the grocery store, comparing my underweight body to a 200+ pound woman and thinking that SHE was thinner than me. I saw all the beautiful things in others but never in myself. I have always seen others as lovely and ideal. After finally learning to love myself I realized that there really isn't a perfect kind of beauty. There's no such thing as perfection. No one is perfect. I finally understood that.....  I recognized that as much fun as it would be to make people look perfect with Photoshop. It wasn't right, it wasn't me, it definitely wasn't them and it wasn't beautiful. Instead, I tried to encourage my clients to wear the proper products, emailing them tips for their session. Some took my advice and some did not. I was feeling so frustrated because I want ALL my clients to look and feel amazing! I want them to feel like rock stars and I knew that if they would just take a little bit of time and effort, they could look and feel amazing. So I decided to try and get people's attention with my own before and after photo to show what a difference the proper application of makeup can look like. In the Image below, the left side is me with all the common mistakes I see people doing. The right side is how I love to do makeup for pictures (Highlighting and Contouring. AKA: HAC) The response from this Facebook post was a bit overwhelming. In a good way! I loved that people were so interested and searching for help with their makeup. However, makeup is NOT one fits all. You really have to learn your face and how to manipulate the makeup to work in your favor. Highlight your best features and minimize what you might not like. That's why I've gathered a few volunteers together with all types of different face shapes and skin types to be my models. I'll be posting more about those soon but I thought I'd start with myself. To find out some more Beauty Tips & Tricks for square faces, keep reading :) 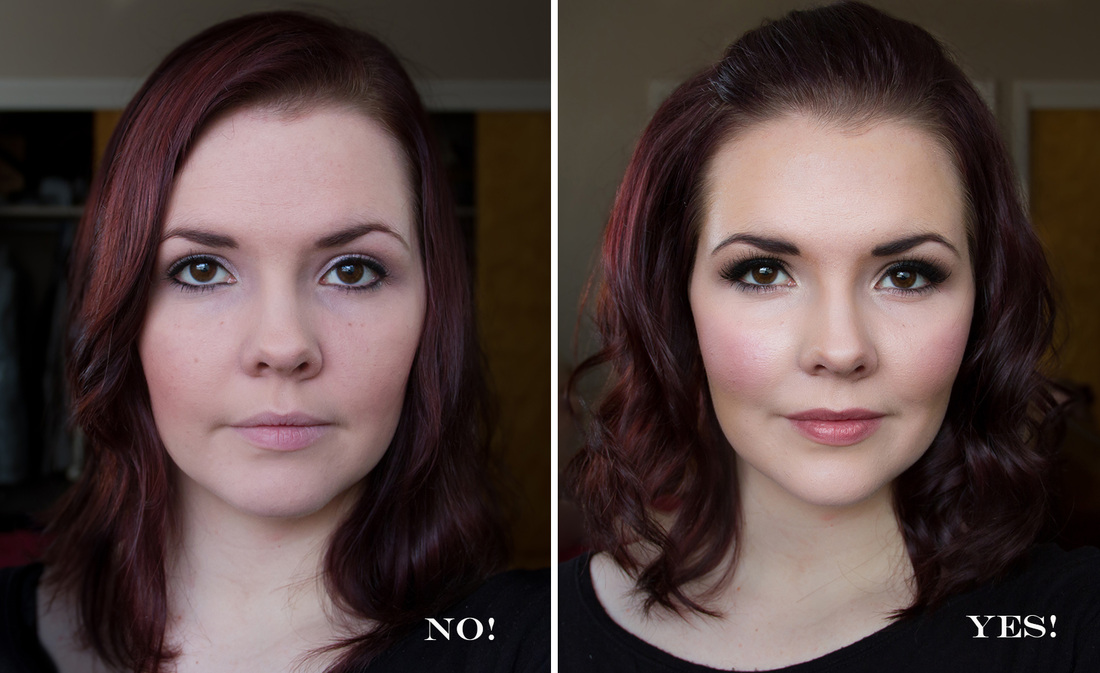  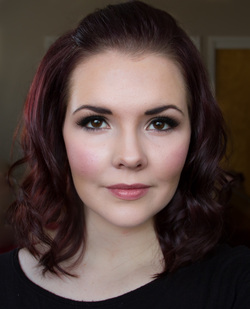 Products: When you're being photographed, I always recommend that you wear makeup that gives you a matte finish. There's nothing worse than having that horrible shine across your face in pictures because you used the wrong foundation. You might be asking, "can't you Photoshop that out?" Its a good question but the answer is no. You want to GLOW in pictures, not sparkle or have that greasy shine. The best product for you really depends on your skin tone and sensitivity. If you have clear, normal skin, you can wear basically anything. If you're like me, where I have the occasional blemish and a couple acne scars from my teenage years I want to hide, than you'll want something with a bit more coverage like cream products. TIP: When you apply cream products to your face, make sure you use a sponge and don't slide it on your face. Make sure you always stipple it into your face. Stipple: To apply with many light dabs in to your face. Below is a gallery of the products I used in the finished image. Hover or click on the images for more on each one. "How do I get that movie star look?" Contouring is key! 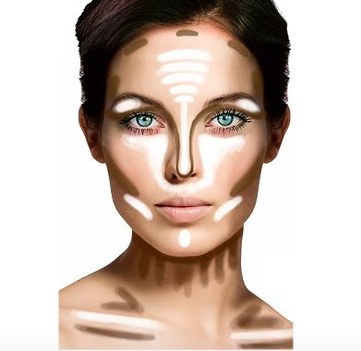 WHAT IS CONTOURING?: You might have also heard it called HAC (Highlighting and Contouring). In the past contouring was harsh and dramatic. The twenty-first century version of Contouring is all about enhancing cheekbones, slimming your face, and tricking the eye in a believable way. Simply put: "It's no longer about carving a line into your cheek." This is my FAVORITE way to do makeup. There are other great ways to apply your makeup but especially for pictures, THIS is what I vouch for every time and the finished results are stunning. I also recommend a light contouring for everyday use as well. The truth is that because of social media and literally everyone having a camera in their pocket, we are being photographed ALL THE TIME! You don't have to go all out every day but little things will make a big difference in your every day look. CONSIDER YOUR SKIN TONE: Anything that stands out too much against skin is going to look obvious. "If you're fair, use a contouring cream or powder that's 1-2 shades darker than your skin tone." The same applies for darker skin tones. For darker skin, you want to make sure that you don't go too light with your highlighting. Otherwise you'll look like you just spread chalk all over your face. LOSE THE GLITTER: From allure magazine... "Highlighter should be "almost the color of your skin, with just a hint of shine," says makeup artist Polly Osmond. Avoid anything with noticeable sparkles, which can look chalky or just plain unnatural. If you have fair skin, a pearly shade works well, but those with medium and dark complexions need a warmer golden highlighter for a glow that looks natural, not pasty." KNOW YOUR FACE SHAPE: As I mentioned before, Contouring isn't the same for everyone. It's important to keep your face shape in mind. If you have a round face, contouring under your cheekbones can make it appear smaller (score!). But if you have a narrow face, it could make it look even longer. BLEND, BLEND & BLEND: Blending is the most important thing when you contour. If your using a liquid, use a sponge like the Beauty Blender. Its amazing. If you're using powder, It's important to hold your brush really softly. Holding the brush toward the end of the handle will give you a softer, more seamless finish. MAKE YOUR LIPS DRAMATIC: Create a plump dramatic lip to draw attention to your lips (and away from your jaw) with dramatic lip color and a plump pout. Using a lip liner will dramatically help to create that full look. The image below is the best way I've found to get that symmetrical plump lip. After I apply my lip color I add just a hint of clear lip gloss for a bit more shine. 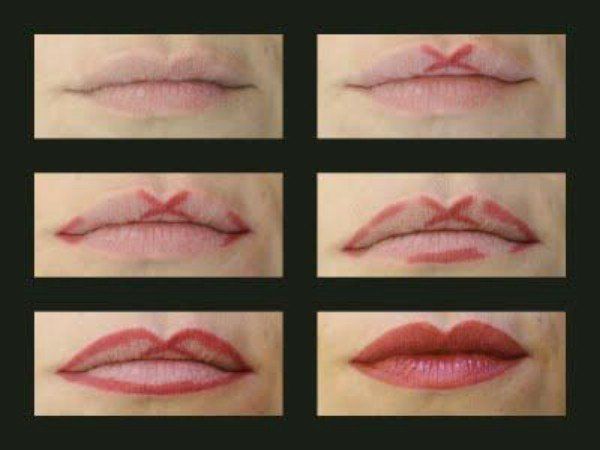 I will be posting a video on how I personally contour my face so you can see what it looks like. I hope that these tips were helpful to you. If you have any questions, feel free to contact me below or send me a question in the comments. My next post will be on the OVAL face shape. I hope you come back again!! |
Archives
July 2014
Categories |


 RSS Feed